Linux for Bioinformatics (for beginners)
Page content
- Why Linux for bioinformatics?
- How to get access to Linux?
- Getting started with Linux commands
- Check the content directory (
ls) - Check the path of current directory (
pwd) - Navigate the directory (
cd) - Create and delete directories (
mkdirandrmdir) - Create and edit files (
vi,touch, andcat) - Reading files (
less,more,cat,vi,head, andtail) - Merging and appending files
- Copy, rename, and delete files (
cp,mv, andrm) - Compress and extract files (
tar,gunzip,unzip, andbunzip2) - Standard output (STDOUT) and standard error (STDERR)
- Search for path of executables (
which) - Basic analysis using Linux commands
sshandscpcommands- Download files from websites (
wget) - Command history (
history) - Command help message
- Check the content directory (
Why Linux for bioinformatics?
The Linux platform is used most widely for bioinformatics data analysis because many open-source bioinformatics applications are command-line and are developed for Linux.
Even though there are different GUIs (graphical user interfaces) available for bioinformatics analysis, they are not customizable and have limited applications.
Therefore, learning Linux commands is an essential skill in bioinformatics data analysis. This tutorial will teach you the basic Linux commands that are needed for routine bioinformatics data analysis and handling.
How to get access to Linux?
- Install Linux OS: Linux distributions (e.g. Debian - Ubuntu; Red Hat - Fedora and CentOS, etc.) can be installed on any desktop or laptop as an independent OS. Ubuntu is the preferred choice as it is open-source, easy to use, and is more user-friendly for software installations and package management. Further, many bioinformatics tools (e.g. BLAST, SAMtools, bedtools etc.) can readily installed on Ubuntu using APT (Advanced Package Tool) package manager.
- Linux on Windows: You can install a Linux environment on Windows using WSL (Windows Subsystem for Linux), Cygwin, or a virtual machine
- Mac OS: Mac OS has a similar command-line environment as Linux (Bash, zsh)
- SSH servers: Access remote SSH servers from Windows (using MobaXterm or PuTTY) and Mac OS
Getting started with Linux commands
When you open a Linux terminal emulator, you should usually see a shell prompt (command-line interface) with a $ sign.
Shell (most popular Bourne Again SHell or Bash) is a program that takes command input from the user and passes it to the OS
for processing, and prints output on the screen.
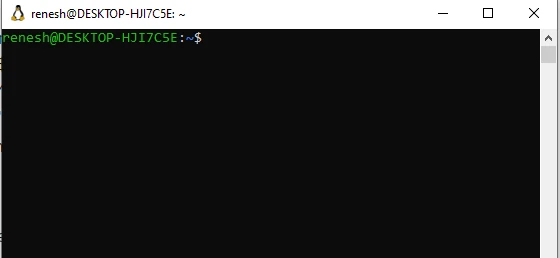
Linux terminal emulator with a shell prompt. terminal emulator and shell prompt can be different based on the Linux distribution
Once a command-line interface (CLI) is open, you can directly enter the commands to execute by pressing Enter. Let’s start with some basic commands,
Check the content directory (ls)
You can use the ls (list) command to list the files and directories in the current path. If you do not provide an
option to ls, it will just list the names of files and directories.
ls
# output
test_file.txt
If you add an -l option, you can see a long listing format including permissions, owner, date, disk size, and time
ls -l
# output
total 4
-rw-r--r-- 1 renesh renesh   22 Aug 25 01:33 test_file.txt
If you add an -lrt option, you can see ascending time sorted (last modified will be at last) long listing format
including permissions, owner, date, disk size, and time
ls -lrt
# output
total 8
-rw-r--r-- 1 renesh renesh 75 Aug 29 19:20 file.txt
-rw-r--r-- 1 renesh renesh 37 Aug 29 19:21 fil2.txt
Check the path of current directory (pwd)
The absolute path to the current working directory can be obtained using the pwd command. It is a highly useful command
during bioinformatics data analysis.
pwd
# output
/home/renesh/test
The variable $PWD contains the path to the current working directory and can be printed using the echo command,
echo $PWD
# output
/home/renesh/test
Navigate the directory (cd)
You can navigate to another directory using the cd (change directory) command. It is the most widely used command
in bioinformatics analysis for navigating through the directory structure.
You can either give a directory name in the current path or an absolute (or relative) path to a directory in another
path. if you just type cd without any directory name, the current directory will change to home directory.
If the directory named test_2 is in the current directory path, you can navigate to test_2 using cd,
# change to directory test_2
cd test_2
Use absolute path (starts with /) to change directory through multiple directories,
# use absolute path from home directory
cd /home/renesh/test/test_2/
You can also use relative path to change directory through multiple directories. In Linux, the double dots .. represents
parent directory (or directoy with one level up) and single dot . represents the current directory. If you want to go
parent directory, you can use cd ...
For example, if you want to navigate from /home/renesh/test/test_2 to /home/renesh/test/, you can use cd ..
# navigate to parent directory
cd ..

# navigate through multiple directory
cd ../../test_3/
If you want to navigate to the home directory, you can just use cd or cd~ commands,
# navigate to home directory
cd
cd ~

# navigate to another directory under home
cd ~/test
If you want to navigate to the root directory, you can just use cd / command,
# navigate to root directory
cd /
Ideally, the directory names should not have spaces. If there is space in a directory name, you need to use a backslash (\)
and press the space key followed by the tab key
cd test\ dir/
Create and delete directories (mkdir and rmdir)
mkdir and rmdir (or rm) commands can be used for creating and deleting directories, respectively.
Create a directory in the current path,
# create a temp directory
mkdir temp
Create a directory in another path with -p. For example, if you want to create directory under the parent directory when
the parent directory does not exist.
# create a temp directory under parent folder
mkdir -p parent/temp
Delete empty directory,
rmdir temp
Delete directory containing files or subdirectory,
rm -r temp

# force deletion
rm -rf temp
Note: You should cautiously use
rm -rorrm -rfcommands as they recursively delete all files and subdirectories. Once the folder and files are deleted, it would be impossible to recover the deleted data.
Create and edit files (vi, touch, and cat)
You can use vi, touch, cat, and echo commands for creating files on Linux
Create and write a file using vi text editor. Once the file is open, you can press i to write or edit the file in vi.
vi file.txt
# to save press ESC and type :wq
Create an empty file using touch
touch file.txt
Create a file using cat,
cat > file.txt
# Type the content and press Ctrl+D
Create a file using echo,
echo "This is a test file" > file.txt
In addition to these commands, you can also use nano, gedit, and vim text editors to create and edit files on Linux.
Reading files (less, more, cat, vi, head, and tail)
In Linux, you can use several commands or text editors for reading complete or partial files. The most popular Linux
commands for reading files includes less, more, cat, vi, head, and tail.
less command is preferred if you are working on big files. You can scroll the file both ways (up and down) when you
open a file with less
less file.txt
# you can type q to exit the file
The more command is also useful in reading the file. You can scroll the file only in one direction with more command,
more file.txt
# you can type q to exit the file
The cat command is useful when you want to view the entire content of the file at one time. The cat command is not
preferred for viewing the content of large files.
cat file.txt
# it will print all content of file.txt on screen
vi text editor is useful for viewing and editing the file. vi is also not preferred for viewing the content of
large files
vi file.txt
# it will open a file for viewing and editing (type i for editing)
# to close file, press ESC and type :wq (save and exit) or :q! (exit without saving)
head and tail commands are useful for printing the first and last 10 lines of a file, respectively. You can also
pass the -n parameter to head and tail commands to print the required number of lines from a file
Print the first 10 lines of a file,
# print first 10 lines
head file.txt

# print first 20 lines
head -n20 file.txt
Print the last 10 lines of a file,
# print last 10 lines
tail file.txt

# print last 20 lines
tail -n20 file.txt
In addition to these commands, you can also use nano and vim text editors to read and edit files.
Merging and appending files
You can use the cat command to merge and append two or multiple files. Here, you need to use the redirection operator > and
>> for merging and appending files, respectively.
Merge two files into another file,
# merge two files
cat file1.txt file2.txt > merged_file.txt
Append content of one file into the content of another file,
# append one file to another file
cat file3.txt >> merged_file.txt
Copy, rename, and delete files (cp, mv, and rm)
You can use the cp command to copy one file into another file and the mv command to rename the files,
Copy file into another file,
cp file1.txt file2.txt
# it will create file2.txt as a copy of file1.txt
Rename file into another file,
mv file1.txt file2.txt
# it will rename file1.txt as file2.txt
Rename directory,
mv dir1 dir2
# it will rename dir1 as dir2
Delete single or multiple files,
# delete file
rm file1.txt

# delete multiple files
rm file1.txt file2.txt
Compress and extract files (tar, gunzip, unzip, and bunzip2)
Most of the bioinformatics tools and files are compressed as .tar.gz or in any other compressed format such as .zip,
.gz, or .bz2. You need to frequently work on compressing and uncompressing data files in bioinformatics analysis.
The tar command is useful for compressing the files and directories into the archive (.tar, .tar.gz, .tar.bz2, etc.)
as well as for extracting the files from a tar archive.
Extract the files from the .tar archive,
tar -xvf archive.tar

# list tar archive without extraction
tar -tf archive.tar
Extract the files from the .tar.gz archive,
tar -xvf archive.tar.gz
Extract the files from the .tar.bz2 files,
tar -xvf file.tar.bz2
Create the tar archive,
# create the .tar archive
tar -cvf archive.tar dir

# create .tar.gz archive
tar -czvf archive.tar.gz dir

# create .tar.bz2 archive
tar -cjvf archive.tar.bz2 dir
Extract .gz compressed files,
gunzip file.gz
Create .gz compressed files,
gzip file.fastq
Extract the .bzip2 compressed files,
bunzip2 file.bz2
Create .bzip2 compressed files,
bzip2 file.fastq
Extract the .zip archive,
unzip archive.zip

# list zip archive without extraction
unzip -l archive.tar
Create the zip archive,
# compress file
zip archive.zip file.txt

# compress dir recursively
zip -r archive.zip dir
Standard output (STDOUT) and standard error (STDERR) (>, >2 and &>)
Standard output (STDOUT) and standard error (STDERR) are two output streams from Linux commands that prints output
and error message directly on the screen. You can also redirect standard output (>1 or just >) and error (2>) to the
files using the redirect operator (>). The &> can be used for redirecting both standard output and error
to a file.
Print standard output on the screen,
head -n2 file.txt
# output
Chr2
Chr3
Print standard output to a file using redirect operator (> or >1),
head -n2 file.txt > file2.txt
cat file2.txt
# output
Chr2
Chr3
Print standard output and standard error to files using redirect operators (> and >2),
# file3.txt does not exist and cat should throw a STDERR
cat file2.txt file3.txt > stdout.txt >2 stderr.txt
cat stdout.txt
# output (STDOUT)
Chr2
Chr3

cat stderr.txt
# output (STDERR)
cat: file3.txt: No such file or directory
Print both standard output and standard error to the same file using redirect operator (&>),
cat file2.txt file3.txt &> out.txt
cat out.txt
# output (here no error is printed as there is no error in command)
Chr2
Chr3
cat: file3.txt: No such file or directory
Search for the path of executables (which)
in Linux, which command is useful to locate the absolute path of the executables (installed commands or tools). For example,
If you would like to know the absolute path of blast command, you can use which command. The which command is also
useful to check if a particular tool is installed and is available in the system path.
Check if BLAST tool is installed and its in system path,
which blastn
# output
/usr/bin/blastn
Check the location of multiple tools,
which blastn blastx
# output
/usr/bin/blastn
/usr/bin/blastx
Basic analysis using Linux commands
Several Linux commands are useful to manipulate the files for data analysis. You can sort, count,
search, replace, and find unique values in the files. Here, I will cover some basic commands such as grep, sort,
sed, and uniq for data analysis. In addition, I will also cover the pipe concept for passing output from one
command to another command.
Search pattern (grep)
grep command is useful for searching keywords or patterns (regular expressions) in files or used in combination with other
commands for regular expressions.
For example, grep is useful for searching a patterns within a file,
# search Chr1 in file.txt
grep Chr1 file.txt
# output
Chr1

# search for multiple keywords
grep -E 'Chr1|Chr2' file.txt
# output
Chr2
Chr1
Use grep with pipe (|) to search for specific pattern (For example, search for all files that contains “file” keyword)
ls | grep file
# output
file.txt
file.zip
Sort the file (sort)
The sort command is useful to sort the content of the file in ascending or descending order,
# sort ascending order (default)
sort file.txt
# output
Chr1
Chr2
Chr3
Chr4
Chr5
Chr5
Chr6
Chr7

# sort descending order
sort -r file.txt
Counting (wc and uniq)
wc and uniq commands are useful for counting purposes
For example, count the number of lines in a file,
wc -l file.txt
# output
8 file.txt
Count the unique lines in a file using uniq command
Here, you will use the pipe (|) for passing the output from sort to uniq command. The uniq command requires
the file to be sorted for counting the unique lines in a file
sort file.txt | uniq -c
# output
      1 Chr1
      1 Chr2
      1 Chr3
      1 Chr4
      2 Chr5
      1 Chr6
      1 Chr7
Count the appearance of a particular keyword using grep
grep Chr5 file.txt | wc -l
# output
2
Count the number of columns in a file
# if file is tab separated
head -n1 file1.txt | tr "\t" "\n" | wc -l

# if file is comma separated
head -n1 file1.txt | tr "," "\n" | wc -l
Find and replace (sed and tr)
You can fine and replace a particular keyword or characters using sed or tr commands
Find and replace with sed,
# replace Chr1 with Chr2
sed 's/Chr1/Chr2/' file.txt
# output
Chr2
Chr3
Chr2
Chr5
Chr7
Chr4
Chr6
Chr5

# redirect the output to another file
sed 's/Chr1/Chr2/' file.txt > replaced.txt
Find and replace/delete characters using tr (tr requires standard input),
# replace A with T
echo "ATGC" | tr "A" "T"
# output
TTGC

# replace multiple characters
echo "ATGC" | tr "[ATGC]" "[TACG]"
# output
TACG

# delete a specific character
echo "ATGC" | tr -d "A"
# output
TGC
Search for files (find)
The find command is useful for searching the files in a particular path or directory
Search file by exact file name in the current directory,
find -name "file.txt"
# output
./file.txt
Search file by exact file name in the home directory,
find /home/ -name "file.txt"
# output
/home/renesh/test/file.txt
Search all files that end with .txt,
find -name "*.txt"
# output
./test_file.txt
./file.txt
Search all files that contain a specific pattern,
# fina all file that starts with file
find -name "file*"
# output
./file.txt
ssh and scp commands
ssh and scp commands are useful when you regularly work on the remote server for bioinformatics analysis. The ssh
command is needed to login into the remote server (SSH servers). The scp command is useful to copy data from a remote
server to the local host (and vice versa).
Login on a remote server using ssh
ssh username@remote_host

# with X11 Forwarding
ssh -X username@remote_host
If you work regularly on remote servers, consider setting up passwordless login to SSH servers
scp to copy data from a remote server to the local host,
# for files
scp username@remote_host:PATH/FILE PATH/local/host

# for directory
scp -r username@remote_host:PATH/DIR PATH/local/host
scp to copy data from local host to a remote server,
# for files
scp PATH/local/host/FILE username@remote_host:PATH

# for directory
scp -r PATH/local/host/DIR username@remote_host:PATH
Download files from websites (wget)
wget command allows downloading the files from the websites. You need to provide a download link to wget.
For example, download the tools from the website,
wget https://ftp-trace.ncbi.nlm.nih.gov/sra/sdk/current/sratoolkit.current-ubuntu64.tar.gz
By default, the download file name will be the same as in the download link. if you want to save with different names, you
can pass -O option to wget
wget -O sratoolkit.tar.gz https://ftp-trace.ncbi.nlm.nih.gov/sra/sdk/current/sratoolkit.current-ubuntu64.tar.gz
By default, the download file will be saved in the current directory. if you want to save under a different directory, you
can pass -P option to wget
wget -P /home/renesh/software -O sratoolkit.tar.gz https://ftp-trace.ncbi.nlm.nih.gov/sra/sdk/current/sratoolkit.current-ubuntu64.tar.gz
Command history (history)
The history command is useful to see the list of commands (with line numbers) that have typed on a terminal emulator.
Display all commands,
history
List the limited number of commands (from latest to oldest),
# list 10 latest commands
history 10
To list the oldest commands, you can use a pipe to redirect the output from the history command as below,
# list 10 oldest commands
history | head
Search for particular commands,
# search for particular command
history | grep gzip
Delete a particular command from history (based on line number),
# delete command which is on line 766
history -d 766
In addition, you can also do a backward search of command history in an interactive way using Ctrl+R keys. Once you
press Ctrl+R, it will open a search tab where you can type a command to search,
![]()
Command help message
You can get detailed information on the usage of each command by passing the --help parameter. In addition, you can
also use man and info commands to get help messages for commands.
mkdir --help
man mkdir
info mkdir
References
If you have any questions, comments or recommendations, please email me at reneshbe@gmail.com
This work is licensed under a Creative Commons Attribution 4.0 International License